

Tiles Installation requires construction materials like sand, cement, and tiles. It is recommended to calculate the required quantity of tiles to perform the tiles installation work as it can minimize the wastage and ultimately becomes cost-effective.
The quantity of tile is measured in the area (sq.ft or sq.mt).
Quantity can be acquired by multiplying length & width of the room in case of floor tile installation
The approximate numbers of tiles should be found out by dividing the floor area by area of one tile.
Materials such as tiles, cement, and sand should be stocked in sufficient quantity.
When materials stocks are at the bottom line, the purchase order should be placed well in advance before commencing work.
Tools Required for Carrying out the Tile Installation Work
Tools required for the installation of the tile work, which is very important without all these tools, the installation work cannot be completed.
Manual Cutter
A manual cutter is one of those tools you always need to have. Easy to carry, use and for almost any type of job, the manual cutter is used for straight or diagonal cuts. Look for cutters with additional guides that offer enhanced visibility when scoring and cutting.
Drill Bits to Make Holes on Tiles
Making holes and drilling tiles require precision and high-quality tools. Drill bits are a very important tile installation tool allowing you the accurate drilling process.
Tile Pincers (Nippers)
Tile pincers or nippers are used to enlarge holes in tiles and form tile edges. Start by scoring the tile with a tile cutter and then use the nippers to cut the tile to the desired shape. Tile nippers are recommended for making circular patterns on ceramic tiles. Some nippers are part of levelling kits, like the one listed in the next step. Remember, when using tile nippers is all about making it precise and calmly, going too fast might damage the tile
Tile Level Installation Kit
The tile installation tool kit has all the necessary small tools a tile installer needs. Starting with tile strips, designed to guarantee the grout joint width and that is used in conjunction with quick caps that distribute the tile weight. The cap eliminates the time spent on checking that the tiles installation is all at the same height and level.
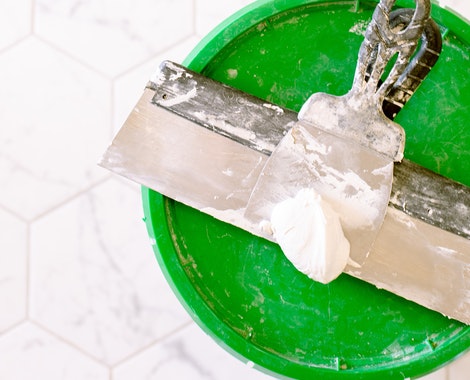
Rubber Buckets
Use rubber buckets to mix your mortar. Rubber buckets are easier to clean than pails, stackable and easy to carry. These buckets, although not necessarily only as a tile installation tool, are used to mix cement, carry materials and store minor stuff for tomorrow’s work. Buckets are available in multiple sizes and volumes.
Tile Mortar Mixer
A good mortar mix is only as good as the mortar mixer can be. Attached with different types of paddles, mortar mixers are available in a variety of speeds and motors. Mortar mixers work great when mixing cement adhesives, resins, paints and other materials. The importance of having a reliable mortar mixer is that it will reduce the air entrapped in the mortar to increase their strength. Make sure to verify that the adequate paddle is used in accordance with the amount of mix used.
Grout Floats
Grout floats are needed to obtain the best results when finishing grout joints. Solid floats should be able to endure multiple uses and installations without decaying. Simply hold the grout float at an angle and start working the grout into the gaps, making sure that there are no air pockets of missed spots.
Set up the Surface
Ensure your surfaces are clean, smooth, and dry for best outcomes. Take time to fix, repair, and level any damaged or lopsided areas. Twofold checks to ensure the surface is fundamentally stable and the area free from wax, grease, and oil. Remove any mouldings, trim, or machines that may interface with tile application and check the doorjambs to ensure tile has clearance when installed beneath. Identifying those potential complexities in advance will enable your installation to run smoothly.
Begin Your Layout
For an efficient layout, start by marking the centre point of each of the walls in the room. Next, snap chalk lines between the centre points of opposite walls to pinpoint the centre of the room. Make any necessary adjustments to ensure that the intersection creates perfect squares. Starting at the centre point, lay a row of loose tiles along the centre lines in both directions, using tile spacers as you go for even, uniform joints. Once you reach the walls, you’ll need to cut tiles for a proper fit. If the cuts required are smaller than half of a tile, you can adjust the centerline by snapping a new line a half-tile size closer to the wall. If necessary, repeat this step along the intersecting centerline for precise design.
Apply the Adhesive
As a general rule of thumb, be mindful of mixing only enough of the adhesive to be used within 30 minutes. Using the flat side of the trowel type recommended on the adhesive package, spread a 1/4″ coat on the surface of one grid area without covering the guidelines. After doing so, hold the trowel at a 45-degree angle and use the notched side to comb adhesive into standing ridges. When you remove the excess adhesive, you leave behind a uniform, ridged setting bed for your tile. As another rule of thumb, do not spread a larger area of your adhesive that can be set in 15 minutes. Stick to the script and facilitate your tile installation with the perfect adhesive application. How to Apply adhesive?….. https://howtospecialist.com/indoor/how-to-spread-tile-adhesive/
Waterproofing
If you’re tiling a wetroom or bathroom floor, it’s vital to waterproof the substrate and seal the room. Whilst porcelain tiles are non-porous, water can seep down through the grout joints into the substrate below. For the ultimate belt and braces approach, fit MAPEI Brand to your substate and tank the joints to ensure a watertight seal.
Cut Tile as Needed
Start by marking carefully measured cuts-to-be with a pencil or felt-tip pen on the tile surface. You can use a tile cutter to achieve pinpoint straight or diagonal cuts. Make masterful curved cuts with a nipper, chipping away small pieces for best results. For any full-length curved cuts, a rod saw is most adequately suited to handle the task. After your cuts are made, smooth out any sharp edges with a carborundum stone to give a soft finish to your tile.
Set Your Tile
Now that you’ve primed the surface, created the layout, applied the adhesive, and cut the tile, you are fully prepared for the actual installation of your tile. Begin by installing tiles in the centre of the room, one grid at a time, finishing each grid before moving on to the next. Within each grid, it will help to start the first tile in the corner and work outward. Using a slight twisting motion, set tiles one at a time and avoid sliding them into place. Be sure to either insert spacers as each tile is set or leave the same joints between tiles. Save the perimeter tiles in each grid for last, leaving a 1/4th inch gap between the tile and wall. Once a grid is completely installed, tap in all tiles with a rubber mallet or hammer and wood block to ensure a solid bond and level plane. Remove excess adhesive from joints with a putty knife and from tile with a damp sponge to prevent an uneven appearance. Lastly, allow your hard work at least 24 hours to set before walking on it. And of course, take at least 20 minutes to admire the time and care you have put into your new floor!
Grouting Joints
Now that Tile is in place and has had 24 hours to set, your last step is to “grout” or fill the joints and consolidate your floor into one mass. After carefully reading and following all instructions and precautions on the grout package, make only enough to use in 30 minutes. As you remove the tile spacers and spread grout on the tile surface, use a rubber grout float or a squeegee to force it down into the joints. Tilt the float at a 45-degree angle and, with the edge of the float, remove the excess grout from the surface immediately. Now tilt the float at a 90-degree angle and scrape it diagonally across the tiles. Once you’ve let the grout set slightly for around 15 to 20 minutes, use a damp sponge to clean any residue from the surface and smooth the grout joints. Make sure to rinse your sponge frequently and change the water when needed. Polish with a soft cloth when the grout has dried and haze forms on the tile surface, and rinse again with sponge and clean water if necessary. Give your newly grouted floor 72 hours before any heavy use and at least three weeks before applying sealers or polishes.
Testing of Tiles Installation Work
Tiles installation work must be checked for the correct line and level.
Particular precautions must be followed at the time of joints checking as they are the main reason for leakages or dampness.
The slope must be checked by dropping some water on the floor. Water should move in the direction of the slope or towards the drain.
Care after Tile Installation Work

Do not step over the tiles for at least 24 hours after tiles installation work by restricting the unauthorized entry.
Clean the area properly after the completion of tiles installation work.
Tiling work must be cured for at least 7 to 10 days and fill the joints with grout and clean them properly after completion of the curing period.
Safety Analysis during Tile installation Work
Method Statement for tiles work must be prepared for handling, placing, and cleaning of materials before carrying out work.
Tiler must be skilled and experienced.
Ensure that all the safety measures (safety helmet, facemask, Rubber hand gloves, safety glasses, and safety shoes) should be provided to the tiler and worker of tiling.
First-Aid measures should be available on the site where tile installation is being carried out.
Always do job safety analysis and carry out trial tiles installation work on small areas before the main operation is to be started. If necessary, Additional safety precautions should be provided.
Ensure proper ventilation and electric lights when tile installation is to be carried out in a confined space and a dark place.
Hoist operators and polishing machine operators must be skilled, and license must be obtained from a recognized agency; otherwise, chances of accidents are more.